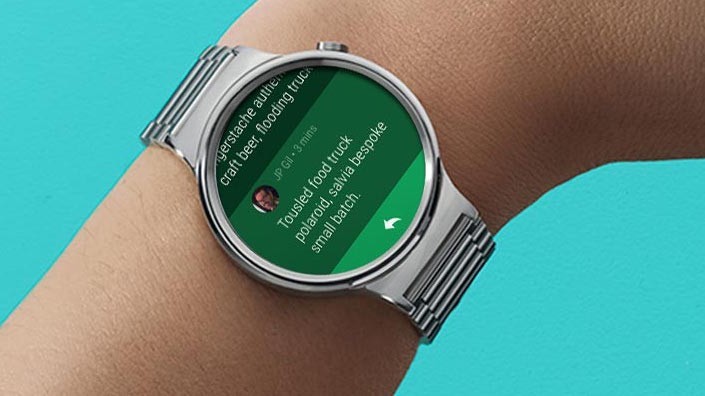
في الدرس السابق تكلمنا عن انشاء محامي اندرويد وير وايضا انشاء تطبيق بسيط اليوم سنتحدث عن استخدام البطاقات في تطبيق اندرويد وير التي تعطي تصميم جميل لتطبيقك وسهولة استخدامها .
يمكنك الاستفادة من اضافة البطاقات في عرض معلومات للمستخدم تعطيه شعور جميل من حيث توافق بين اندرويد وير وتطبيقك.
تحتوي مكتبة wearable على CardFrame Class والذي يسمح لنا باستخدام البطاقات في التطبيقيات .
نبدأ في الدرس ? .
من خلال الدرس السابق قم بانشاء تطبيق اندرويد وير . هنا،
هناك طريقتين لاستخدام CardFrame :
- استخدام CardFragment Class .
- اضافة CardScrollView في ملف layout .
-
انشاء CardFragment :
يتيح لك CardFragment اضافة عنوان ووصف وايقونة للبطاقة كما في الصورة :
 |
 |
للبدء في انشاء Card Fragment سنقوم بانشآء في ملف Layout العنصر الذي سيحتوي على البطاقة كما في الكود في الاسفل :
<?xml version="1.0" encoding="utf-8"?>
<android.support.wearable.view.BoxInsetLayout
    xmlns:android="http://schemas.android.com/apk/res/android"
    xmlns:app="http://schemas.android.com/apk/res-auto"
    android:layout_height="match_parent"
    android:background="@drawable/back"
    android:layout_width="match_parent">

    <FrameLayout
        android:id="@+id/frame_layout"
        android:layout_width="match_parent"
        android:layout_height="match_parent"
        app:layout_box="bottom">
    </FrameLayout>

</android.support.wearable.view.BoxInsetLayout>
نلاحظ عرفنا FrameLayout ليكون مكان عرض الـCard .
الان في ملف Activity الخاص بنا سنقوم بانشاء CardFragment وسنقوم باضافتها باستخدام Fragment Manager الى Frame Layout وسيكون الكود بهذا الشكل :
FragmentManager fragmentManager = getFragmentManager();
                FragmentTransaction fragmentTransaction = fragmentManager.beginTransaction();
                CardFragment cardFragment = CardFragment.create(getString(R.string.cftitle),
                        getString(R.string.cfdesc),
                        R.drawable.ic_insert_emoticon_grey_600_18dp);
                fragmentTransaction.add(R.id.frame_layout, cardFragment);
                fragmentTransaction.commit();
الطريقة الثانية :
-
اضافة CardScrollView في ملف layout .
نستطيع اضافة Card الى ملف Layout الخاص بنا ? مما يتيح لنا الكثير من التخصيصات اضافة نصوص وصور وتخصيص الاحجام والاماكن ايضا كما في الصورة :
 |
 |
يكون الكود بهذا الشكل في ملف Layout
<?xml version="1.0" encoding="utf-8"?>
<android.support.wearable.view.BoxInsetLayout xmlns:android="http://schemas.android.com/apk/res/android"
    xmlns:app="http://schemas.android.com/apk/res-auto"
    android:layout_width="match_parent"
    android:layout_height="match_parent"
    android:background="@drawable/back">

    <android.support.wearable.view.CardScrollView
        android:id="@+id/card_scroll_view"
        android:layout_width="match_parent"
        android:layout_height="match_parent"
        app:layout_box="bottom">

        <android.support.wearable.view.CardFrame
            android:layout_width="fill_parent"
            android:layout_height="wrap_content">

            <LinearLayout
                android:layout_width="match_parent"
                android:layout_height="wrap_content"
                android:gravity="center"
                android:orientation="vertical"
                android:paddingLeft="5dp">

                <ImageView
                    android:layout_width="40dp"
                    android:layout_height="40dp"
                    android:src="@drawable/ic_favorite_red_800_24dp" />

                <TextView
                    android:layout_width="match_parent"
                    android:layout_height="wrap_content"
                    android:fontFamily="sans-serif-light"
                    android:text="@string/cftitle"
                    android:textColor="@color/black"
                    android:textSize="20sp" />

                <TextView
                    android:layout_width="match_parent"
                    android:layout_height="wrap_content"
                    android:fontFamily="sans-serif-light"
                    android:text="@string/cfdesc"
                    android:textColor="@color/black"
                    android:textSize="14sp" />
            </LinearLayout>
        </android.support.wearable.view.CardFrame>
    </android.support.wearable.view.CardScrollView>

</android.support.wearable.view.BoxInsetLayout>
طبعا من الكود السابق انشئنا تصميم بسيط من ٣ عناصر صورة ونصين وبامكانك ايضا اضافة المزيد من العناصر والتصاميم المعقدة مع العلم انه سيتم عرضها بشكل متناسق مع الساعة دون الحاجة للاقتصاص من عناصر التصميم.
الى هنا نكون في نهاية درس Card الخاص بنظام اندرويد وير.


The post have resolved our problem,thank you very much and hope you writting more good articles.
This post have resolved our problem,thanks very much and hope you writting more good articles.