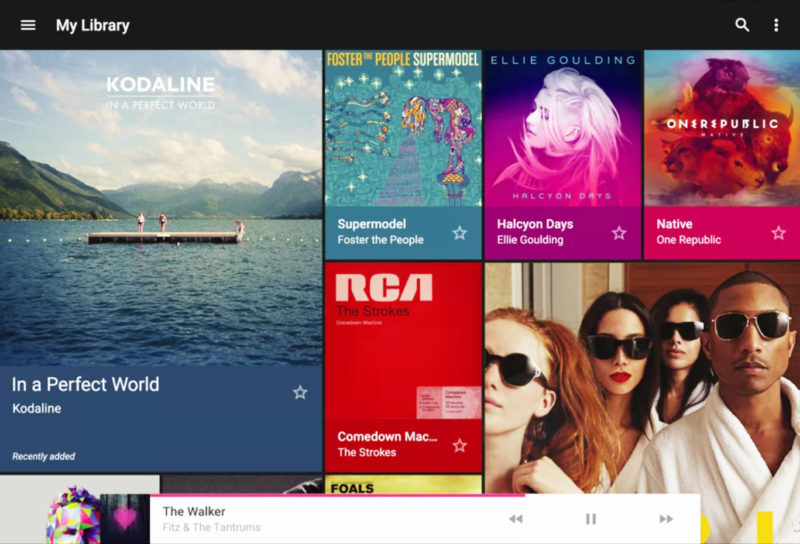
مع اطلاق نظام لوليبوب للاندرويد وتصميم الماتيريال ديزاين الجميل تم اصدار مجموعة من المكتبات الداعمة لهذا التوجه والتصميم للانظمة القديمة وتم اطلاق عليها اسم support على هذه المكتبات . سنقوم اليوم بشرح مكتبة pallete وهي مكتبة مسؤولة عن استخراج الالوان من الصور بشكل سريع لتكون لديك صوره متناسقة مع محتويات التصميم من ازرار وخلفيات ونصوص الخ.
-
اضافة المكتبة :
سنقوم باضافة هذا السطر في bulid.gradle :
dependencies {
  compile 'com.android.support:palette-v7:23.1.1'
}
-
الالون المستخرجة :
ستقوم مكتبة palette باستخراج ٦ مجموعات من الالوان وسنقوم بالاختيار بما يناسب التطبيق او بما يتماشى معك
- Vibrant
- Vibrant Dark
- Vibrant Light
- Muted
- Muted Dark
- Muted Light
-
طريقة العمل :
هناك طريقتين لاستخدام هذه المكتبة :
-
Synchronous :
Palette p = Palette.from(bitmap).generate();
هنا نستخدمها اذا كنا نقوم بتحميل الصورة من خلال عمليات الخلفية خارج Mainthread .
-
Asynchronous
// Asynchronous
 Palette.from(bitmap).generate(new PaletteAsyncListener() {
     public void onGenerated(Palette p) {
         // Use generated instance
     }
 });
هنا الطريقة الافضل لاستخدام palette وتقوم المكتبة بتوليد الالوان عند الانتهاء مباشرة من تحميل Bitmap .
-
مثال :
ساقوم في هذا المثال باستخراج جميع الالوان الـ٦ الافتراضية من الصورة
-
تصميم الواجهه :
 سنقوم بتحميل صورة Bitmap من ملفات Resources في التطبيق وسيكون الكود بهذا الشكل :
Bitmap myBitmap = BitmapFactory.decodeResource(getResources(), R.drawable.example);
الان بعد تحميل صورة Bitmap من ملفات التطبيق لدينا سنقوم باستخدام Palette وسيكون بهذا الشكل :
Palette.from(bitmap).generate(new PaletteAsyncListener() {
     public void onGenerated(Palette p) {
         // Use generated instance
     }
 });
داخل دالة onGenerated سنقوم باستخدام palette العائد الينا من الدالة وسنقوم اولا باستخراج
-
Vibrant
Palette.Swatch Vibrant = palette.getVibrantSwatch();
                if (Vibrant != null) {
                    textVibrant.setTextColor(Vibrant.getTitleTextColor());
                    textVibrant.setBackgroundColor(Vibrant.getRgb());
                }
-
Vibrant Dark
Palette.Swatch DarkVibrant = palette.getDarkVibrantSwatch();
                if (DarkVibrant != null) {
                    textVibrantDark.setTextColor(DarkVibrant.getTitleTextColor());
                    textVibrantDark.setBackgroundColor(DarkVibrant.getRgb());
                }
-
Vibrant Light
Palette.Swatch LightVibrant = palette.getLightVibrantSwatch();
                if (LightVibrant != null) {
                    textVibrantLight.setTextColor(LightVibrant.getTitleTextColor());
                    textVibrantLight.setBackgroundColor(LightVibrant.getRgb());
                }
-
Muted
Palette.Swatch Muted = palette.getMutedSwatch();
                if (Muted != null) {
                    textMuted.setTextColor(Muted.getTitleTextColor());
                    textMuted.setBackgroundColor(Muted.getRgb());
                }
-
Muted Dark
Palette.Swatch DarkMuted = palette.getDarkMutedSwatch();
                if (DarkMuted != null) {
                    textMutedDark.setTextColor(DarkMuted.getTitleTextColor());
                    textMutedDark.setBackgroundColor(DarkMuted.getRgb());
                }
-
Muted Light
Palette.Swatch LightMuted = palette.getLightMutedSwatch();
                if (LightMuted != null) {
                    textMutedLight.setTextColor(LightMuted.getTitleTextColor());
                    textMutedLight.setBackgroundColor(LightMuted.getRgb());
                }
-
كتابة قيم افتراضية :
ربما لم تتمكن المكتبة من استخراج الالوان من الصورة او تكون الصورة ذات لون واحد هنا يكون لدينا مشكلة وهو اعادة القيمة بـnull . نحتاج في هذه الحالة استخدام الوان افتراضية في حال كانت الصورة لاتحوي الوان او لم تتمكن المكتبة من استخراج الالوان لاي سبب كان
Palette palette = Palette.generate(myBitmap);
int default = 0x000000;
int vibrant = palette.getVibrantColor(default);
int vibrantLight = palette.getLightVibrantColor(default);
int vibrantDark = palette.getDarkVibrantColor(default);
int muted = palette.getMutedColor(default);
int mutedLight = palette.getLightMutedColor(default);
int mutedDark = palette.getDarkMutedColor(default);
هنا قمنا بوضع لون افتراضي من نوع int بحيث اذا لم تستطع المكتبة اعادة الالوان فسيتم وضع اللون الافتراضي الخاص بنا.
هذه المكتبة البسيطة تعطي تطبيقك تصميم جميل ومتناسق استخدمها في تطبيقاتك لاحظ لبفرق في التغيير الجميل.


